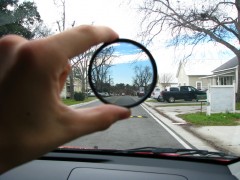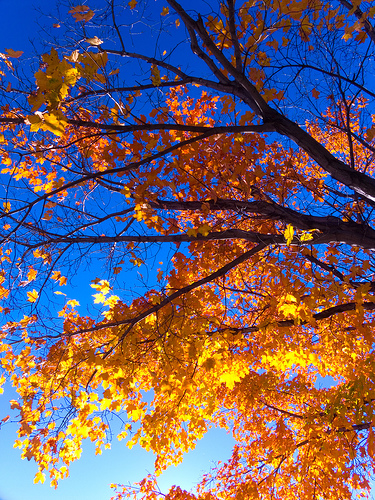
When photographing landscapes, the primary aim of the photographer is to render the beautiful colors of nature. The natural colors enhance the overall look and feel of the captured scene, making the photographs unfold the secrets of natural scenery. The landscapes offer a wide variety of colors and natural source of lighting, the sun, which often tricks the camera and thus obstructs the sensor to read the data as it appears to human eyes naturally. In the midst of camera’s auto adjustments and features of light, the saturated and vivid colors of nature get lost. One way to tune the camera to get saturated colors is to use filters. In this particular case, you can use a polarizer filter. A polarizer filter is the photographer’s friend for photographing natural scenery, waterfalls (and other reflective surfaces) and landscapes.
What Is A Polarizer Filter
If you are not the techy kinds skip to the next section. Since we aim to be considerably thorough and interested in covering the details, here’s what a “polarizer” is.
A polarizer filter is the glass fitting designed to block some specific light rays. The polarizer filter is used to filter or block the polarized light from reaching the camera sensor. The light reflected from non-metallic surfaces (like water, glasses, skies) is said to be polarized. Polarization is a property of certain types of light-waves that describes the orientation of their oscillations. Light exhibits the polarization owing to the fact that the direction of vibration and direction of propagation is not the same. The particles of light move in the random fashion and scatter the light, resulting in unwanted reflections, glares, color casts etc., which poses a challenge when including the reflective (or certain other) surfaces in the photograph. The polarizer filter consists of two glasses, where the front element is rotated to get the desired effect: saturated colors, enhanced contrast in sky and clouds and reduction of glare and reflections.
The polarizer filter is one of the must-haves for landscape photographers. It is often seen that the effect of a CPL filter cannot be achieved by any amount of image editing. The photographer has to specifically use the polarizer filter to portray the white clouds against deep blue skies or add a little contrast. There are two types of polarizer filters, linear and circular. Barring their effect on the photographs, the modern day SLR manufacturers recommend to use circular polarizer filter or CPL (owing to auto-focus camera sensors).
A CPL filter consists of two circular glass elements. The rear element of the filter is tightened to the front element of the camera-lens. The front element of the filter is free to rotate, thereby making adjustments possible. The adjustment is made by rotating the front element of the filter from 0 to 90 degrees. Rotating any further repeats the same effect as between 0 to 90 degrees.
When To Use A Circular Polarizer Filter
The effects of a CPL are best put to use in landscapes or scenes calling for extra saturation, extra contrast and controlled reflections (glare). When shooting outdoors, a CPL is a must in your filter arsenal. If you mainly shoot landscapes, the CPL will be on your lens most of the time. Remember to take it off when you don’t need it (as you will see in the next section).
How To Use A Circular Polarizer Filter
The circular polarizer is most effective when the plane of the filter glass is parallel to the direction of light. In other words, the axis of rotation of the camera-lens / filter is perpendicular to the direction of light. This means it will have maximum effect when the direction of light is not in your line of vision. When the direction of light is parallel to your line of vision the filter will have minimum effect. The effect can be varied by rotating the front element of the filter to your preference.
CPLs tend to enhance vignetting effect when mixed with other filters. So when using a CPL try to minimize the use of other filters to control the vignetting effect. If you shoot RAW then vignetting is not going to be an issue and can always be taken care of during the post-production phase.
Tips On Using CPLs
- The amount of effect a CPL depends on the direction of light and the color-cast of the sky.
- On a sunny day, position your shoulder towards the sun and your subject at a right angle to your shoulder. When the sun is high in the sky, maximum polarization will result along the horizon. When the sun is low in the sky, maximum polarization will result in all areas in front of and behind you.
- The CPL will have minimum or limited effect on a cloudy day and is better to keep it away when planning to photograph a rainbow.
- Using any filters in addition to the CPL will enhance the vignetting effect.
- A CPL will induce some amount of underexposure.
- Avoid CPL when shooting sky with a wide angle lens. The result varies across the sky so much that it becomes very unflattering and distracting.
When Not To Use The Polarizer Filter
Even though a polarizer filter is good for photographing outdoors, it should be avoided for use in indoor photography. The polarizer filter tends to offset the exposure by about 1 to 1.5 EV (regardless of the direction or adjustment), which is undesirable for photographing in low-light or at night.
Secondly it tends to render well-saturated colors which results in unflattering skin tones for portrait photography. Because of the extra contrast in the scene (due to the polarizer) the portrait gets the landscape-effect — high contrast, extra saturation, underexposure. All these effects ruin the portraits.
If you are shooting panoramas or 360 deg. scenes, the effects of the polarizer can’t be matched across all the angles in the different shots and it will be very obvious in the final stitched image.
Utility Of Polarizers
The essence or the beauty of polarizer filter lies in its proper use. Polarizers have to be adjusted by rotating the filter till you achieve the desired effect and at times it becomes difficult to analyze the effect of polarizer through viewfinder. Using a polarizer is not as easy as fitting it to your camera, it involves practical experimentation for filtering the polarized light to achieve the desired effect with polarizer filter. But done right, polarizers have effects that you simply can’t achieve otherwise or digitally. Your landscapes, reflections, skies need a polarizer and it’s going to be a wise investment. Circular Polarizers or CPLs are available in various sizes. Hoya is a reputed brand and makes excellent CPLs. You can easily find polarizing filters offered by Hoya in 52mm, 55mm, 58mm, 62mm, 67mm, 72mm, 77mm, 82mm at Adorama.


Hi,
Is the same thing like color saturation can’t be acheived by using HDR option in my DSLR?.I understood HDR may not cut the reflection and by the way iam new to DLSR photography
Thanks
Raj
Great post. So many people are unfamiliar with how to use lens filters. In addition to Hoya, the brand you mentioned, SIGMA also makes a variety of lens filters.