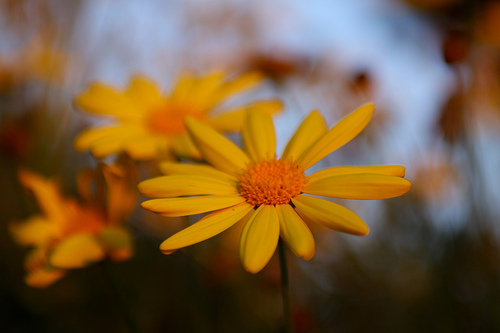
The aperture is the small opening inside the lens that controls the amount of light falling on the film or the digital sensor. It is one of the pillars of exposure and its diameter is denoted in f-numbers or f-stop. Remember that this value is relative as it is the ratio of the aperture to the focal length. So an f/3.5 on a 80 mm lens will be smaller than an f/3.5 on a 200 mm lens.
Every professional camera equipment has an aperture scale and may have f- stops like f/3.5, f/4, f/4.8, f/5.6…. f/19, f/22. The smaller the number, the wider is the aperture and the greater is the amount of light that comes in. Every successive f-stop halves the amount of light coming in for example, f/4 will allow half the amount of light than f/3.5.
Aperture, Exposure & Depth Of Field
While the greater the amount of light you have, the larger your playground becomes. On a bright and sunny day you can even shoot at f/22 where as in a dim light (like indoors) you may need to open up your aperture at the way to maximum so that the camera can make use of whatever light is available. But that’s not the only application the aperture has.
The aperture works in tandem with other controls like shutter speed (the duration for which the shutter remains open). Learn more about shutter speed here. The choice of aperture has a huge effect on how the subject appears against the background. A wide aperture produces a shallow depth of focus while a small aperture produces a deep focus in the composition. This depth of focus is called depth of field. Time to warm-up — check out the beautiful pictures demonstrating the depth of field here.
And now let’s dive into the technicalities of depth of field or simply DOF…
A shallow depth of field will focus on the subject and render everything behind and in front of the subject blurred. This is a great trick to separate your subject from the background and comes in handy to portray selective focus. The shallow depth of field induces a dreamy effect — by smoothly blurring the backgrounds or by complimenting the subject or the scene with awesome bokeh effect.
On the other hand, a high depth of field puts everything into sharp focus. This is useful when you are shooting natural scenery or landscapes or want to put the subject in perspective of their surroundings. The photograph provided below portrays a high dof by putting everything in focus, the foreground and the background as well.
A Simple Exercise
Here is a simple exercise to help you visualize the impact of various aperture f-stops on the images. See how narrow aperture puts everything in sharp focus and a wider aperture beautifully throws the background off the focus.
- Get hold of any small object – a cup or a paper weight will do fine.
- Place your camera on a tripod. Use a stable surface or a table in absence of a tripod.
- Place the subject about two meters from the camera. Setup this up in daylight so that you have ample playground for small aperture.
- Place a pen or a small object about one meter behind the subject.
- Take two shots. If you have a DLSR set it to aperture priority mode and set the aperture to the maximum (the smallest f-stop). In the second shot set the aperture to the minimum (the max f-stop). If you are on a consumer camera, set the camera on a macro mode in the first shot and in the landscape in the second shot.
- Copy the two shots to your laptop or computer and view them full size.
- The first shot should have only the subject in focus. The second shot should have the second object in good focus too.
This is what we call the aperture magic. But that’s not it! There are several other effects achieved by playing around with the aperture like sunstars and awesome sun flares. Check them out here — cool aperture effects.


I really liked it very much.