Today’s cameras are the the know-it-all kind of equipment — they have everything built-in to help you get the correct exposure. But as they say they are machines. Cameras don’t make photographs you do. Cameras only aid you in getting it right. And for that matter the definition of right and wrong is very flexible in the field of art. The cameras expose to get a well illuminated photograph of the subject. All is well until you want to get creative. And that is when you have to take control of the settings.
Many recommend learning to use manual exposure settings and getting used to them. But then for something as trivial as exposure why do you need to fiddle with ISO, aperture, shutter speed or bracketing? Not unless you want to get creative.
What is Exposure Compensation
The exposure compensation control is one such setting that saves you fiddling with ISO, aperture, shutter speed or bracketing and get the exposure of your choice. This comes in very handy when you just want to underexpose or overexpose a particular scene at your will. Depending on the mode that your are shooting in the exposure compensation will vary the shutter speed or the aperture automatically. For example let’s say you want to shoot in aperture priority mode. This means you want to take control of the depth-of-field. Thus using the exposure compensation will leave the aperture to the setting of your choice and alter the shutter speed instead.
Uses of Exposure Compensation
-
Capturing challenging lighting conditions
For certain scenes the smart camera is really dumb. For example, for an evening scene the camera will automatically set the exposure so that the shot is well illuminated. This results in a scene which looks similar to shot on a bright cloudy day – no harsh light but still so much that it doesn’t look like the evening any more. Setting the exposure compensation to -1 or -2 will help you bring down the exposure level to portray the scene correctly. Also see how you can portray weather and various levels of light.
-
Fine-tuning
At times you may not really like the default results of the camera. If you feel your shots are overexposed or underexposed in most situations you can change the exposure compensation by 1/3 stop or 1/2 stop.
-
Getting the Colors right
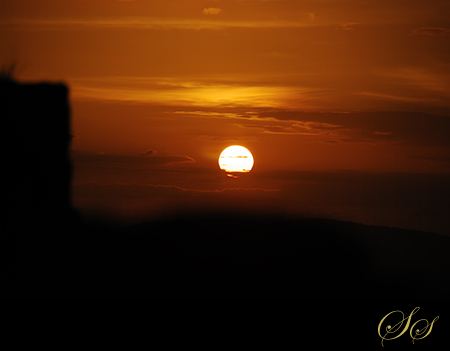
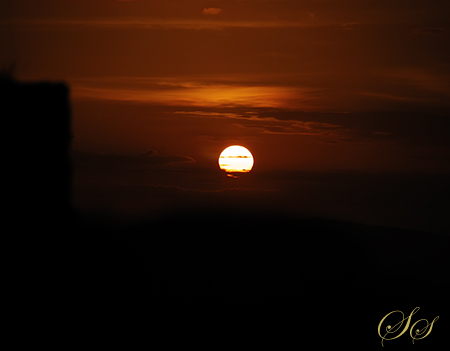
That red of the sunset will never come out right unless you set the exposure compensation to negative (i.e. -1 or -2 – your mileage may vary). Or you could bracket at the cost of wasted storage space. Hint: underexposing leads to darker colors. Overexposing leads to washed out colors. In other words the more the level of white (light/illumination), the less the level of colors. Or you could slightly underexpose to exaggerate the colors.
This was a sunset for which I had to climb 342 feet. I toiled around all day for a location and waited till the evening to get the light just right.

Setting the exposure compensation to one stop less gave me the strong red that I was expecting. It would have ruined the entire shot if I hadn’t used exposure compensation. Not only the cloud have a golden line, they look more three dimensional.

-
Using Shutter speed to your advantage
If you are shooting a low-light scene in the aperture priority mode, shooting RAW at high ISO and a negative exposure compensation (-2) gives you several stops (2 stops) of critical shutter speed. This means you have two extra stops of ability to freeze action in low-light. Isn’t that great! You will have to bring out some shadow details in the RAW editing program.
-
Using Aperture to your advantage
If you are shooting a low-light scene in the shutter priority mode, shooting RAW at high ISO and a negative exposure compensation (-2) gives you several stops (2 stops) of critical aperture. This means you can shoot at smaller aperture and gain more depth-of-field that you would without exposure compensation. You again will have to bring out the shadow details in the RAW editing program.
There is no such thing as an absolutely correct exposure. Unless you do something funny and obvious like shooting a portrait resulting in an unilluminated subject in the photograph (which makes it quite obvious to point out that you faulted), the right exposure is ideally the choice of the photographer. It is his expression – what he wants to capture or the feel and mood he wants to bring into the image. Exposure compensation button comes in handy


If you are shooting RAW no real need to worry about a little -EV or +EV in one direction or the other. I would focus more on composition.