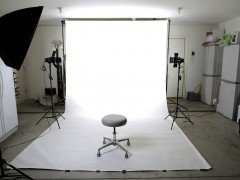
 Are you planning to put up a small home studio or are getting serious about extending your lighting kit? At one point of time or other you will have to go in for it with your hard earned money. It is quite overwhelming to get involved in buying the appropriate lighting equipment; especially when you are just getting started with artificial lighting — so many brands, multiple varieties and a never ending list of studio lighting equipment & accessories can cause you nightmares. One simple thing you can do is to begin with a basic studio set-up and later expand as need arises. And to get you started with a basic set-up, here is a foundational introduction to fundamental photographic lighting equipment — to help you decide what do you essentially need to get started.
The lighting equipment basically falls in three primary categories. First the light source, secondly the light modifiers and last but not the least you’ll need the grips and stands to set-up lights for professional photo-shoots.
Let’s start with the light sources…
Light Sources
Lights, tools and equipments offer such expansive variety that a beginner easily get tangled in the issues like,
- What would be good affordable starting studio lights?
- What should I invest in — flash guns or studio strobes…
- What is a better option; basic home lights like tungsten lamps and florescent lights or dedicated studio flashes?
Well there can be no right or wrong and good or bad lighting decision. It is just that you need to know the pros and cons of various lighting sources. This will help you in choosing the light source that works for you.
The artificial light source thus can be divided into two broad categories:
Continuous Lighting: Continuous lights include the basic lights used at home like tungsten bulbs, fluorescent lights, LEDs and HMI lights. Though they come cheap, they have a high running cost and aren’t as versatile as studio flash lighting. Considering the power consumption, mobility & control over output, flashes are far more handy and useful. And this is why professional photographers favor studio lights over other lights.
Studio Flash: The studio lights are classified as flash guns & strobes and strobe lights are further categorized as monolights and head & power packs. Each light source has its own definite purpose.
Flash guns: Flash guns also known as speed-lights are external flash units employed by the photographers. These battery powered flash units are mounted to the hot shoe or can be used off-camera by attaching them to the slave units. The sole purpose of the external flashes is to boost the flash-range of on-camera flash.
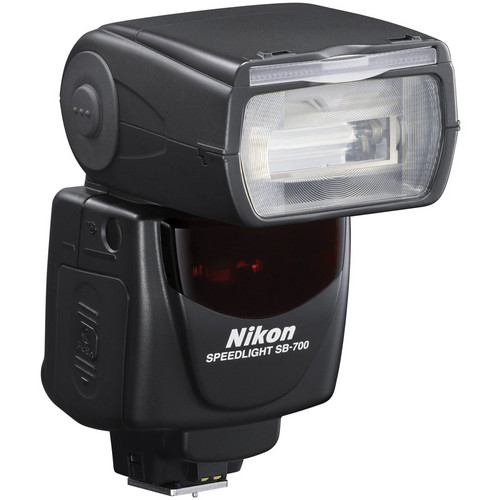
Nikon SB-700 Speedlight Shoe Mount Flash
Flash guns, however have their own pros and cons. They come in handy for outdoor lighting set-up owing to its lightweight, but lags behind studio strobes as far as light power, recycle times, light modification and pre-visualization of lighting effects is concerned. The detailed distinction between the two is however out of the scope of this post.
Studio Strobes: Studio strobes are large, powerful and operate independent of camera. As mentioned earlier, studio lights or strobes are of two kinds: Monolights and Head & Power packs.
The head and power packs consists of a flash and a small power pack that acts as the generator for operating the flash light. You can attach multiple flash heads to a single power pack and all these flash heads are comfortably controlled by the controls & knobs provided on the power pack itself.
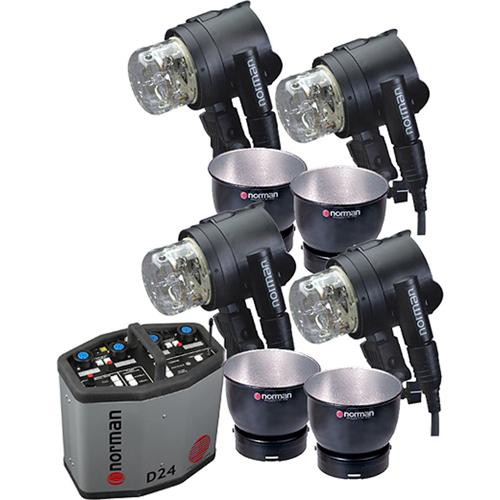
Norman D24R Pack, 4- IL2500 Head/Reflector Kit
A monolight on the other hand is a portable photographic flash lighting unit which has its own independent power source. Unlike a head & power pack kit, it does not depend on a centralized power supply. Each monolight has its own power settings and light output.
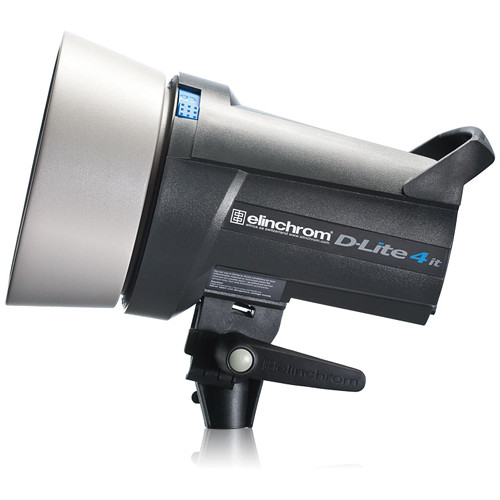
Elinchrom D-LITE4 IT 400Ws Monolight (90-240VAC)
Using monolights or head & power pack in your lighting set-up depends on a lot of things. First one is of course the budget, because head & power packs come on the costlier side. But if your shooting against the light source, take shooting against the sun for instance where you want to overpower a bright source of light, you will definitely need more power and better recycle times. Or when you have a complex lighting set-up, you will like to control the lights from a single point instead of fidgeting with single monolights. Under such situations, head & power pack is more suitable.
But again there is no right & wrong or good & bad about choosing the lighting equipment. Both have their advantages and disadvantages and we would love to touch upon this topic in a dedicated post.
Light Modifiers
Studio lighting set-up is a controlled lighting environment and just having the light sources at disposal is not enough. You need a number of light modifiers to actually control the spread of light. Some modifiers are best at use for reflecting the light (commonly known as reflectors), some are used for diffusing the light (the diffusers) and there are yet other modifiers which are used to output concentrated and focus light.
The very first reflector at the photographer’s disposal is the one that comes attached to the flash itself. These standard reflectors resemble the lampshade and are fixed to the flash heads. These reflectors help in casting directional light towards the subject. Some of them like Profoto ProHead Flash Head for instance comes with a zoom reflector which allows you to slide and lock the reflector to thus control the spread of light.
Next comes the umbrellas and softboxes.
Umbrellas are the one of the basic lighting equipment you will find in any basic lighting kit. These reflective umbrellas are used by photographers as a diffusion device which softens the light and evenly spreads the light over a larger area. The strobe light is mounted to the umbrella in such a way that the light hits the inside of the umbrella and bounces back to the subject with soft light & even illumination.
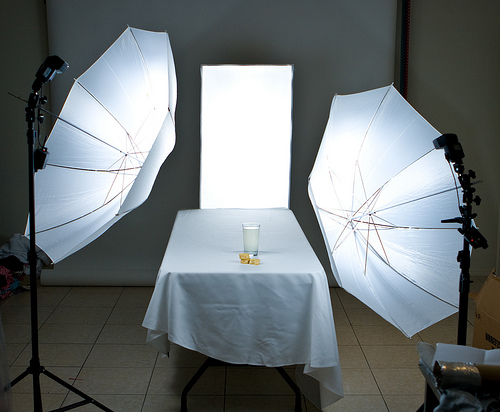
The same effect can be achieved in one of the two ways; either by using a shoot through umbrella which illuminates the subject by the pass through light or by using a reflective umbrella which lights the subject through bounced back light.
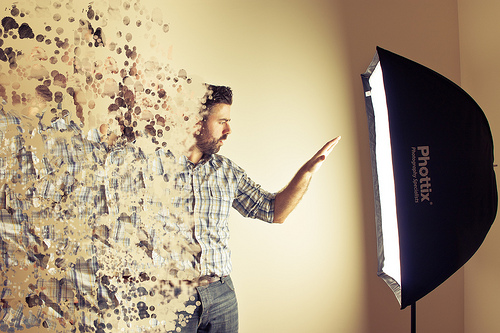
In both the cases, the soft light spills and wraps around the subject. This spilled light may bounce of the walls & ceiling and end up illuminating a wider area. This may act as a hindrance for getting the desired light effects. In such cases, soft-boxes are a better option.
A softbox is also used for softening and diffusing the light. Softboxes come in varied shapes and sizes but at the most basic it consists of a reflective surface surrounded by a diffuser. The flash head is fitted in such a way that the light falls on the reflective surface, passes through the translucent diffuser and produce a controlled soft light. This is to say that the light coming out of the softbox is more controlled and doesn’t spill elsewhere.
Then there are snoots, barndoors, flags and honeycomb grids to the photographer’s exposure. These equipments allow for a more concentrated light. A snoot is a conical shaped tool which fits over the flash head to produce a narrow beam of light which can be used as accent or kicker light to separate the subject from the background. Barndoors is a set of adjustable flaps attached to the light for directing and obstructing the light from spilling. Photographers also use flags for blocking the light. A flag is usually an opaque object placed in the way of light to cast a shadow, provide negative fill, or protect the lens from a flare.
One more interesting tool for studio photography is the honeycomb grid. This metallic honeycomb shaped grid directs more focused light to the subject.
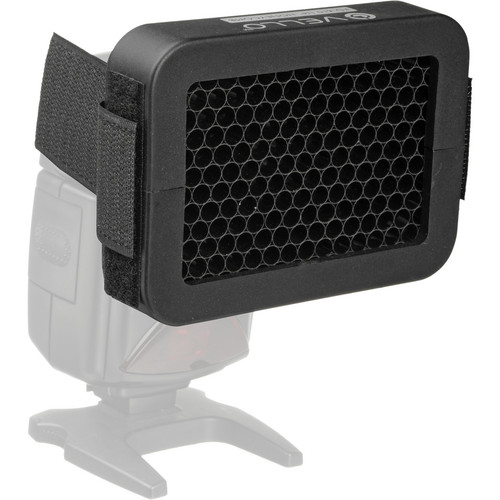
Vello 1/4″ Honeycomb Grid for Portable Flash
Other than this there are various flash accessories; flash reflectors, flash diffusers and the likes which help you in modifying the light. But as a beginner, having hands-on experience with the umbrellas, softboxes and honeycomb grids can get you rewarding results.
And now let’s put up the last piece of the lighting equipment puzzle in place — the light stands and grips; the lighting equipment fundamental block for building the required lighting set-up.
Grips & Light Stands
Grips refer to anything that supports the lighting set-up. It includes the light stands, boom arms, clips & clamps which are used for holding the backdrops, reflectors and light sources. You can find two varieties of light stands — lightweight stands and heavy duty durable C stands.
The lightweight stands are portable and good for use in indoor photo-shoots. There mobility is an advantage for easily arranging and moving the lights around the studio. The lightweight stands have sandbags attached so as to the weight of lights and reflectors. Some of them also have an air shock feature. The air shock feature makes sure that the lights or reflectors don’t break when the knobs are accidentally loosened.
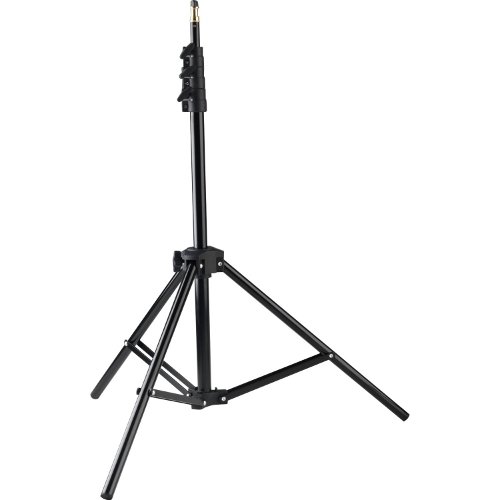
Westcott 750 Photo Basics 7.0-Foot Light Stand
Then there are C-stands with their own set of benefits. C-stands are more durable, stable and can take up much more weight as compared to lightweight tripod type light stands. These durable stands come in handy to face-off windy weather while shooting outdoors and thus save you a lot of damage.
Conclusion
This is just an overview of various lighting equipments at your disposal when entering the world of photographic lighting equipment. There are a lot of brands and varieties for each of the products. It’s not always wise to invest in new equipment. You can start with a basic lighting kit and spend a few bucks in buying the used gear. Once you know you really need that set of tools or equipment (or the equipment actually works for you), you can buy a new one for yourself.
So what do you have in your lighting kit?


I’m a beginner, I’ll like to know more about studio photography.