 Controlling the light and mastering the exposure is the mantra for success as a photographer. Understanding the camera’s metering is akin to mastering the light & exposure. Getting to know how the camera reads the light and translates this information into shutter speed, aperture value and ISO is what determines the exposure; optimal exposure to be precise.
In case of digital cameras, it is an in-built light meter that works as the brain behind the camera’s calculation for determining the shutter speed, ISO and aperture values for a particular scene. The in-built light meter takes the guesswork out of the field and enables you to get optimum exposure in almost all the cases when the camera is operating in auto and semi auto modes.
I have personally experienced this neat camera trick of determining the exposure and would like to encourage you to test it out for yourself if you haven’t yet played around with it.
Turn your camera to one of the semi-auto modes; aperture priority or shutter priority. Let’s take shutter priority for instance. Set the shutter speed to any arbitrary value say 1/30sec. and keep the ISO to ISO 100. Mount the camera on the tripod.
Now rotate the camera and make a note of the aperture values as the camera pans. The camera meters and automatically sets the appropriate aperture value depending upon the amount of light entering the lens. This explains the basic functionality of a light meter — the ability to determine the proper exposure (in terms of aperture f-number, shutter speed and ISO) for a photograph.
While the sophisticated digital beasts nowadays have in-built light meters, professional studio photographers still keep the external light meters handy. These hand-held light meters enable them to proficiently work in the manual mode and yet get the exposures that they want (and the final result as visualized by the client). The hand-held meters help them get the accurate exposures under various lighting conditions. But before looking at the how and why of the light meters, let’s start with what a light meter basically is.
What Is A Light Meter?
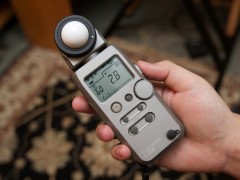
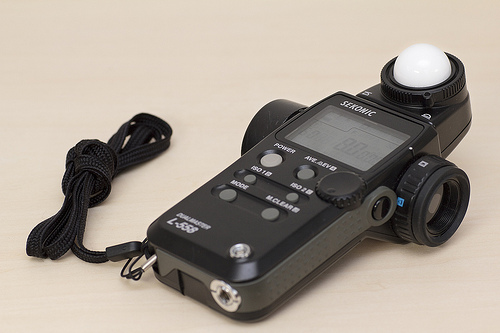
A light meter is a device used to measure the amount of light. It measures the light levels in the scene and makes an approximate measure of appropriate exposure based on that. The intensity of light for determining the exposure can be measured in one of the two ways; reflected light metering or incident light metering.

The reflected light metering measures the intensity of light reflected from the subject. The light meters built in the camera work on this principle. It measures the brightness of the scene depending upon the amount of reflected light entering through the lens (thus the name TTL metering). The calculation of exposure however depends on the metering mode (spot metering, matrix metering or center weighted metering) in use. You can see how various metering modes affect the exposure here.
Incident light metering on the other hand determines the exposure depending on the amount of light falling on the subject. The photographer holds the light meter close to the subject to take the reading of the light falling on the subject. The intensity of light measured in this way is often more accurate as the light levels are not tricked by the reflectant properties of the subject. Incident light metering also allows better control over exposure in studio lights. It reads the light falling from multiple sources and gives the photographer accurate readings for maintaining the light ratios (for setting up key light, fill light and kickers).
Most hand-held light meters offer both incident as well as reflected readings. And some far more sophisticate ones also provide flash metering modes especially for metering the flash lights. The light meters with flash metering modes are of great help for studio photography where external flash units and strobe lights are at play.
The traditional film photographers exclusively needed hand-held light meters to get the accurate exposures. And the trend still continues. Professional studio photographers don’t rely on camera’s meter. Instead they prefer using an external or hand-held light meter to master the light & exposure.
This brings us to the most common question asked by the photography enthusiasts, i.e., why use a light meter when we already have one built in the camera? Let’s look at it here.
Why Use An External Light Meter When You Have One In-camera?
The answer to this question is simple. An external light meter is your safety guard against the “tricky” exposure situations like photographing a shiny black car in bright sunlight, shooting the candle light in the dark room, taking the shot of a snowy landscape, etc.
While the camera’s in-built meter is good for determining the optimal exposure for the scenes which are essentially middle-toned, light meters comes in handy for scenarios where you have complex lighting and extremes in tonality (for instance photographing a tiger in snow as below).

The need for hand-held meter arises owing to the limitations of built-in light meter. The built-in light meter is a reflective light meter. It reads the light reflected of the scene or the subject, assumes that the subject is of average 18% reflectance and sets the exposure accordingly. While this provides correct reading for middle toned scenes (with average subjects in average lighting situations), the problem arises if the subject is too light like a white wall or too dark, shiny black car for instance.
The in-built light meter when averages the exposure for the snowy landscape depending on 18% neutral gray standard, it essentially under-exposes the scene to make the snow appear middle gray. Similarly, in-built camera meter over-exposes when shooting the dark scenes or subjects.
The probable solution to the problem is to then use incident light metering, which is possible only through hand-held light meters. But there is one more twist to it. External light meters in reflective mode can also meter the scene accurately.
This is so because hand-held light meters take the reading from a narrow portion of the composition. The camera meter reads around 3% to 5% of the scene and average the readings. The light meter on the other hand reads the light in one degree, i.e, 0.05% of the scene. This allows you to choose a mid-toned portion of the scene to take the light readings and set the exposure accordingly.
When you set the exposure for the middle-toned scene, all the other tones fall into the place, thus saving you from under-exposing or over-exposing the scene.

The other limitation of the camera’s meter is that it cannot meter the flash light. And thus the other scenario where hand-held meters prove their worth is studio lighting set-up. The complex lighting scenario with artificial lights, strobe units, flashes & the need to maintain the lighting ratios and where flash metering plays an utmost important role, hand-held light meters act as a blessing. The hand-held lighting meters can be synced with on-camera or off-camera flash to provide the accurate exposure settings.
In the studio set-up, the professional photographers shoot in the manual mode with ISO set to ISO 100 (to eliminate the chances of noise and grain in the photograph) and the shutter speed synced with the flash. What the photographer actually need to fill in the exposure equation is the aperture value. The photographer takes the incident light reading and sets the aperture value as determined by the hand-held light meter.
However, you don’t need to worry about light meters unless you are working in studio or are faced by challenging lighting scenarios. But you can consider to invest in one if you want to master the exposure in manual mode or if your camera doesn’t meter light accurately.
And now let’s see how to use a light meter.
How To Use A Light Meter?
The light meter works with respect to the pillars of exposure, i.e, the aperture, the shutter speed and the ISO and thus allows the photographer to determine which shutter speed and f-number should be selected for an optimum exposure, given a certain lighting situation and constant ISO.
The hand-held light meter works pretty much the same way as the camera works in semi-auto mode. You have to set two values from the exposure equation of ISO, aperture and shutter speed and the light meter determines the third value for you.
For the sake of simplicity, the photographers keep the ISO to ISO 100 and set either shutter speed to determine the aperture value for given lighting scenario or aperture value to determine the shutter-speed.
However, you can also play around with various f-stop / shutter speed combinations to get creative with depth of field or motion blur. You can simply rotate the main dial or press the arrow buttons on the meter to see the various combinations for a given lighting situation and choose the one that allows you to freeze the motion or blur the background.
You can use the light meter in either of the two modes — Reflected Light Metering or Incident Light Metering.
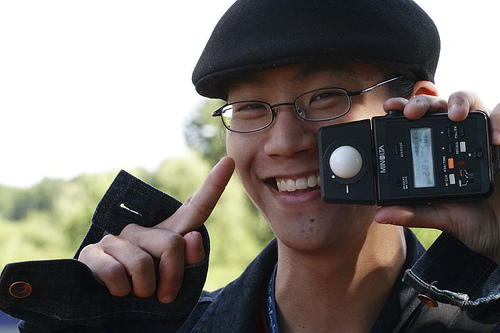
When using the reflected light metering mode, you need to hold the light meter with the white dome facing towards the subject to take the reading of the light reflecting from the subject or scene. In this case you will get appropriate reading if you hold the light meter closer to the camera.
In case of incident light metering, you need to assess the amount of light falling on the subject. So hold the light meter closer to the subject so that the meter detects the same level of light that is falling on the subject.

Make sure that the white dome faces the camera lens rather than the light source. This will ensure that the light meter reads the light as is falling on the subject and viewed from the photographer’s position.
Additional References
Mastering the exposure with light meters is quite comprehensive subject. We have tried to cover the basics. You can further refer the following articles to learn more about getting accurate exposure with light meters.
- Accurate Exposure with Your Meter
- How To Use A Hand-held Light Meter
- Using a Lightmeter and Placing the Photographic Exposure
Do you use light meters? Share your experience with us!


You haven’t shot studio portraits, have you? And you are here to advise us about the uselessness of light meters. Beginners in the comfort zone of exposure compensation may not need a light meter. Those who plan to make photography their profession do.
Trigger happy users can choose to stay away from light meter. There’s a reason the pros use a light meter. May be it helps to boost their egos as well. Instead of shying away from technology, learn to live with it, catch up and use it to make photography better.
@ Shivanand Sharma. Actually I do shoot studio portraits! and I teach the shooting of studio portaits. And once again, in the days of film I used a external / flash meter all of the time (and taught it of course). But now days when teaching studio photography I don’t teach the use of an external light meter.