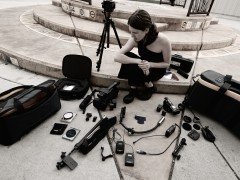
Shooting indoors can be very challenging due to the limitations of indoor lighting. But indoor photography is one kind which allows you to explore your creativity to the maximum given that mostly the light sources are artificial and you can exercise complete control over them. While photography is all about light, indoor photography is also about the equipment you employ and how creatively you put them to use. In this two-part article lets get familiar with the equipment and why we need them.
-
Flash
The on-camera built-in flash is a generic-purpose do-everything light. While flash is not recommended for the kind of photography we are talking about, investing is an external flash-gun is highly recommended. Using it with a Sto-Fen diffuser will provide you with a secondary source of usable light.
-
Light
Photographers prefer to work in soft-light unless they have specific requirements for hard-light. Soft-light keeps the shadows and highlights in control while illuminating the subject uniformly. You need a soft-box for this purpose which diffuses the light and softens it. I’d recommend you to use a home-made soft-box unless your photography work is fetching you good returns in which case you should go for a commercially available soft-box with a strobe light which you can fire with a wireless trigger fitted on the camera’s hot-shoe.
-
Reflectors
When budget is a consideration, full-size thermocol sheets are the answer. Acrylic sheets also come in handy to build up a make-shift light-tent to photograph small objects. The purpose of these reflectors is to illuminate the areas which fall opposite to the light falling on the subject. In day-light these are often not a problem as the light source is larger than the subject and the shadows are negligible or soft. But for our purpose investing in two thermocol sheets and 3-4 acrylic pieces (about 12 x 12 inches) is economical and does the job. Now all you need is a an assistant to hold them in place or find a make-shift stand – the results are the same in either case – they are at par with commercial photographs.
-
Light-meter
Even as a hobbyist if you are serious about photography, invest in a light-meter. Not that the in-built exposure-meter of the camera is any less useful but there’s a fundamental difference. The inbuilt camera meter gives you the reading based on the light reflected off the subject while a hand-held light-meter gives you the reading based on the incident light or the light hitting the subject. A light-meter is thus more accurate and usable for serious photography. More on metering in my post on metering modes in your camera.
-
Flash Trigger
Just in case you choose to invest in a strobe light the flash-trigger will enable you to fire the slave flash. Get a wireless one and you won’t tri over the wires and multiply your camera into pieces.
-
Tripod
Due to the low-light conditions indoors, even at maximum aperture, the shutter-speed has to be way low. This warrants the use of a tripod. Even a table or a similar placement will do but tripod is recommended.
-
Lens
While a zoom provides a lot of flexibility is terms of subject distance and framing, a fixed focal-length lens provides you with better quality images. But that’s not the consideration here. When you are shooting indoors, you are shooting small subjects from a close distance. You have to keep the perspective correct and also need the ability to really zoom-in close. Go for anything above 70mm (ideally 100mm and above) and you shall be fine.
-
Miscellaneous
So far so good. But indoor photography and especially table-top photography is pretty much based on makeshift arrangements. When you have to splash liquid off a glass you won’t count on the ice-cubes but use transparent plastic cubes which do a better job being shot as ice-cubes and never melt away. Some glycerin mixed with plain water can be sprayed onto things to make them shine with highlights and add gloss.
So much of it is exploring, experimenting, getting creative and learning. But guess what, we’ll come back in part-two of this post to show you how to put all this equipment to use and get started with it in a “hands-on” post.


I am all about the triggers as well. It is just too difficult to not use it.
If you want to open a photo studio and you dont know the equipment you need for a studio then I will advice you to go do some thing else with your money….