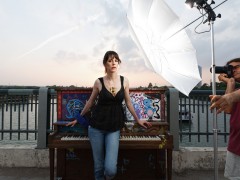
Shooting in your studio is fun since you are in complete control of the equipment. We looked at the basic and essential equipment for a make-shift studio setup in Part I of this post: Studio Photography Essentials — Tools And Equipment so just in case if you haven’t checked it out we’ll wait.
- Light – For this workshop you’ll need to have two other members by your side of which one will act as your subject and the other one as the assistant – call out to your cousin or friends. Sit your subject against a plain background; any color darker than gray would do if your subject is in bright clothing. Position the softbox at the top front of the subject elevated at 45 degrees and about a feet from the subject – would do just fine for a closeup or portrait.
This small distance increases the effective size of the light source with respect to the subject thereby illuminating the subject more uniformly and softening the light further.
- Camera – Set your camera to manual exposure mode. Mount the wireless flash trigger to the hot-shoe of the camera. Mount your camera on the tripod. Place the tripod directly in front of the subject comfortably at a distance of 12-15 feet (given that you are using a lens in the range of 70mm-200mm). Position the camera at the eye-level of the subject. Test fire the flash (strobe) to check the wireless trigger setup. For now you are done with the camera and we’ll return back to it later.
- Metering – Grab your hand-held light meter, with the strobe turned on turn off all the other ambient light in the room. This will ensure that the lighting conditions are similar to the time when the camera takes the exposure. We’ll now need to measure the light as it will be at the time of exposure (the flash will provide additional intensity which we need to take into account now). So refer to your light-meter’s manual and set the light-meter to the mode where it will wait for the flash to fire before providing you the reading. Set the shutterspeed in the light-meter to 1/60 and the ISO to 100 (the camera also should be set to use the same). Now all that we need to know is the aperture which is what the light-meter will tell us. Position the light-meter under the chin of the subject (the mid-tones) with the bulb pointing to the camera lens. Ask your assistant to fire the flash. Take the aperture reading from the light-meter and set the camera to use the same aperture. Just in case the meter reads out an impractical aperture, you may want to decrease the shutter speed or the ISO and take the reading again.
- Reflections – This is your call. You need to take a few test shots and determine if you want some fill light to bounce off a reflector and illuminate the subject’s surface opposite to the light. Depending on your choice you may want to bring the reflector close to the subject or move it farther away to increase or reduce the fill. Just like the soft-box, the reflector too can typically be as close as 1-1/2 feet to the subject.
- The Shot – You are now ready to photograph the subject. Make your subject comfortable, ask them to pose and shoot. Given that you’ve followed this guide properly, you’ll get some commercial class results. But just in case you want to experiment, try repositioning the reflector or meter the light again just to be sure.
Good luck and do not forget to share your results with us.


Good tips! Pretty basic … but these are exactly some of the most important points that a budding photographer should keep in mind.