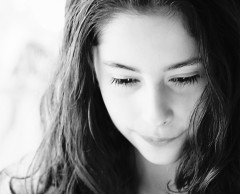
Lighting is the most important aspect in photography. It is an indispensable element for creating desired effects. It evokes drama, renders form and above all creates mood. Understanding the features and characteristics of light opens up a plethora of opportunites for creatively capturing the scene. Along the lines of various lighting techniques, high key lighting is one such lighting technique which spills the magic of bright light on the subject. This bright light magic communicates upbeat, light, ethereal or beautiful mood. Let’s quickly move ahead and learn more about high key lighting or high key photography.
Introduction To High Key Lighting
High key lighting or high key photography is the technique of creating bright images — the images full of light. Technically speaking, high-key lighting is a photographic style of lighting that aims to reduce the lighting ratio present in the scene. This was originally done partly for technological reasons, since early film and television did not deal well with high contrast ratios. But now it is creatively employed by the photographers to convey positive or upbeat mood.
High-key lighting is usually quite homogeneous and free from dark shadows. This overall bright and even illumination adds aesthetic value to the subject. It is for the very same reason that high key lighting is mostly used for capturing beauty shots of the portraits; be it child portraits or beautiful feminine photographs.
3 Quick Steps For Shooting High Key Photographs
Are you ready to try your hands at shooting some high key photographs. Here are three simple steps to help you establish a small studio set-up for photographing a bright image of a flower, product or a portrait.
- White Background: White backdrop is a prelinimary requirement for high key images. In professional studio set-ups you will find a 9 ft wide roll of paper high on stands, rolled all the way across the background and onto the floor of the shot. An empty white wall or a plain white sheet are good contenders for seamless white background. Place the subject in the center of the backdrop or prefer using a light tent when photographing a product or flower.
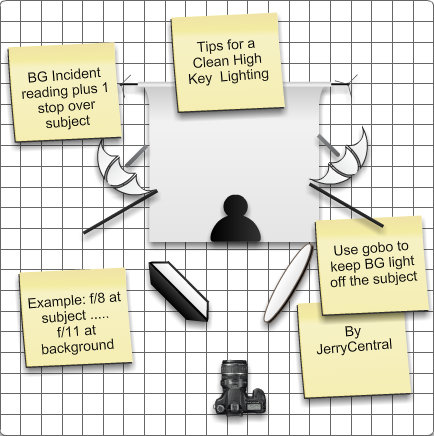
- Proper Lighting Set-up: Three point lighting or four point lighting set-up is good consideration for shooting high key images of your subject. Set up a key light to one of the subject. Make sure that the key light evely lits the subject. Next place the fill light on the opposite side to cover up the harsh shadows. And arrange the remaining lights angled to the background to eliminate the shadows casting on the backdrop. Also keep your background lights one f-stop over the subject lighting to introduce depth in your high-key photographs. Check out this high key lighting diagram by Jerry Schmidt.
- Fine-tune Camera Settings: There are no constant camera settings for high-key photographs. But one thing that remains constant is over-exposure. Owing to the white background and bright light, the camera’s meter gets tricked and underexposes the shot. You will therefore need to over-expose the shot (either by using exposure compensation dial or by turning on the manual mode) to get the correct exposure. Here are few high key images along with the camera’s settings to give you a fair idea about shooting eye-catching high key images.
Examples — Eye-catching High Key Photographs
Life Is All About Priorities by Chris JL
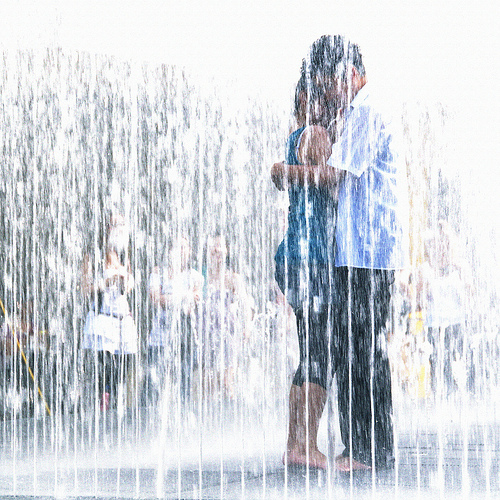
This shot was taken by Nikon D90 with following settings:
- Exposure Program: Manual
- Exposure: 0.008 sec (1/125)
- Aperture: f/7.1
- ISO Speed: 200
“High Key” Kyan Carlos by Ronmarshall074
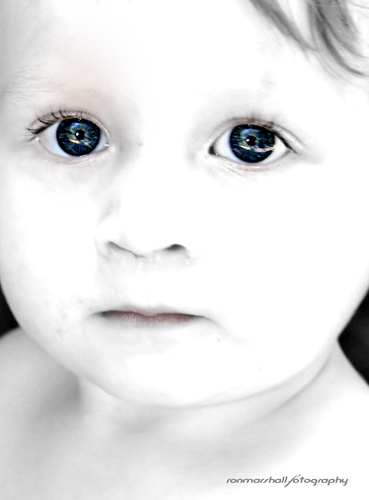
This shot was taken by Canon EOS 400D Digital with following settings:
- Exposure Program: Normal
- Exposure: 0.017 sec (1/60)
- Aperture: f/5.6
- ISO Speed: 200
- Exposure Bias: 0/3 EV
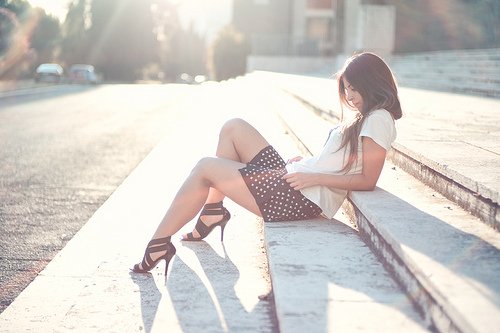
This shot was taken by Leica Camera AG M8 with following settings:
- Exposure Program: Manual
- Exposure: 0.002 sec (1/500)
- Aperture: f/5.7
- ISO Speed: 160
High Key Lighting Studio Set-up
Learn to take control of photographic lighting with this amazing video. Here in this video, Mark Wallace explores two dramatic lighting alternative — high key and low key. While low-key, high-contrast dark images can be achieved with minimal lighting, creating bright images is a challenge. You have to over-expose the background, evenly lit the subject and have to control the lights from spilling onto the subject. Don’t worry, it is not that difficult. Just go through this video tutorial and you’ll be in a good position to photograph soft, delicate and beautiful high key photographs.
3 Good Tutorials On High Key Photography
- The Complete Beginner’s Guide to Shooting High Key [Photo.Tutsplus.Com]: The Complete Beginner’s Guide to Shooting High Key published by Phototuts+ is a good article to begin with. Josh Johnson starts with a brief introduction of high key photography which finally develops into a full-fledged guide for picking up the right equipment, appropriate lighting set-up and precise camera settings for shooting brilliant high key photographs.
- How to Take High Key Photos [Photopoly]: You can achieve high key lighting effect by various means — a studio set-up, natural available light or photoshopping. This article gives you a taste of all the three methods along with a few examples for inspiration.
- High Key vs Low Key [Photofairy]: This article presents comparative view of high key and low key. It presents a contrasting study of the two lighting techniques in the light of exposure, contrast and mood. Along the way, the writer shares some valuable tips for creating artistic images by employing high key and low key lighting techniques.
Do you have some high key shots in your collection? Feel free to share the links through comments.


Excellent article and really lovely photos! Thank you very much for mentioning my tutorial also :)