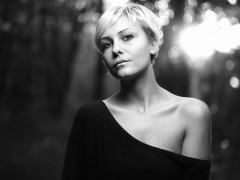
One of the key skills of a professional portrait photographer is the perception of light and its nature in diverse forms. Be it the natural light or the studio set-up, the portrait photographer can aesthetically portray expressions, mood, emotions and intense depth onto the photographic frame. When we talk of portrait photography, one element that helps you set apart your portrait photographs is the skill of arranging the lights to render the required effect.
The understanding of portrait lighting is required not only for illuminating the subject well, it is far more important for rendering the shape, form and character of portraits on two-dimensional flat surface. Mastering over the portrait lighting thus helps you in portraying the realism — conveying sentiments as a key aspect and adding dimension (curves and contours) for idealism. Employing the features of lights used in portrait photography help you in separating the subject from the background and foreground to give it a distinct dimension in this respect.
We all at certain point of time are engaged in photographing the portraits and learning the basics and fundamentals of portrait lighting (style, techniques and set-up) can help you get the professional results. So, let’s get started with the basics of portrait lighting and eventually throw light on the portrait lighting set-ups employed by the professionals.
Basics of Portrait Lighting
The primary purpose of portrait lighting is to create a three dimensional illusion. The photographers thus employ various lights, features of light and lighting ratios to reveal the contours — render the shape and form on the photographic frame. Portrait lighting is all about the interplay of lights in form of highlights and shadows which help in creating flattering images and heightening the sense of depth.
- Primary Lights: The primary lights in the photographic lighting are referred to as the key light and the fill light. The key light is the primary source of illuminating the subject. The purpose of the key light is to highlight the form and dimension of the subject. The fill light on the other hand is the supplementary source of light which is used to fill the shadows resulted from the primary source of light. In portrait photography, the placement of key light and fill light relative to the subject is of critical importance. For example, if you want to portray soft and supple skin, place the key light near the camera and move the light closer to subject and let is fall from the side to emphasize the facial textures. Just as key light determines the illumination, the fill light augments the effect of the key light by controlling the shadows resulted from key light, thus placing the fill light closer to the camera-subject axis ensures that the shadows cast behind the subject.
- Types Of Portrait Lighting: Basically, there are two types of portrait lighting, broad lighting and short lighting. Broad lighting means that the key light is illuminating the side of the face towards the camera, thereby broadening and flattening the facial curves. The short lighting is used most of time. It is the terminology used for the key light illuminating the side of the face turned away from the camera; which results in narrowing the round or wide face, rendering the curves and form to the facial structure.
- The Size Of Light Source:The size of the light source also has an impact on the final result. Smaller the size of the light, more is the contrast in the scene; whereas the larger light source illuminates the highlights and shadows evenly resulting in soft and smooth effect in the photograph. Apart from the physical size of the light source, the distance of the light source relative to the subject also accounts for the effectiveness and intensity of the light falling on the subject. If you move the subject away from the light source (eg. from 1mtr to 2mtr) i.e, twice the distance, its brightness/illumination reduces to 1/4 of earlier observation. And in order to maintain same exposure, you will have to increase the amount of light by four times. The inverse square law comes into play in this situation and thus the results vary when the subject is moved away from the light source while the camera settings remain unchanged.
- Metering: Most of the professionals working with a studio use a hand-held light meter. It allows for greater flexibility, accuracy and control of overall dynamic range (shadows and highlights) of the portrait. The built-in lightmeters in the camera on the other hand meter the entire scene. Often the built-in meters are tricked by mixed lighting too.
- Lighting Ratios: The lighting ratio is the ratio of intensity of highlights to the shadows. The higher the lighting ratio, the higher the contrast of the image. This ratio thus intimates the photographer on the local contrast in the final result. The ratio of 3:1 is desirable in most of the cases, while 8:1 is an indicator of low key image.
Portrait Lighting Set-up
Once you are well-equipped with the basics of portrait lighting or photographic lighting in a general scenario, it is easier to understand how photographers use these basics to create stunning portrait photographs. Various lighting set-ups, the arrangement of lights in simple words is employed by the photographer to introduce the desired effect.
- Paramount Lighting: Paramount lighting or the butterfly lighting produces a butterfly shaped shadow under the subject’s nose which renders symmetry and emphasize the feminine facial contours (the cheekbones). It is also known as the glamor lighting and is generally avoided with male subjects. In this lighting set-up, the key light is placed above and closer to the subject and the fill light is adjusted under the key light. Along with it a secondary reflector is used for reducing the shadows resulting on neck and cheek to evenly illuminate the subject.
- Loop Lighting: In this lighting set-up, the key light is lowered and moved to the side of the subject to diminish the shadow under the nose to a small loop. And fill light is placed opposite to the camera from the key light. The lighting technique is used for balancing the oval shaped facial profiles.
- Rembrandt Lighting: Rembrandt lighting is characterized by an illuminated triangle under the eye of the subject, on the less illuminated side of the face. The key light is further lowered and moved to the side and is either diffused or used with weak fill light to highlight the seriousness of masculine figurines.
- Split Lighting: Split lighting technique is used to slim down the wide face, perhaps by lighting only half of the face with key light and using weak fill light to hide facial irregularities or no fill light to accentuate drama in the image.
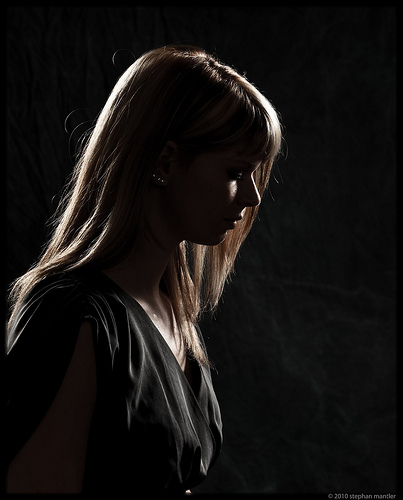
- Profile Lighting:Profile lighting, also known as the rim lighting is achieved by placing the key light behind the subject, so the rim or outline of the subject’s body is illuminated. The rim light effect is quite similar to back light effect (as in the image given below).
What’s your favorite portrait lighting setup?


Thanks for the article. apnphotographyschool is my favorite website on photography techniques! I’m a newbie though)
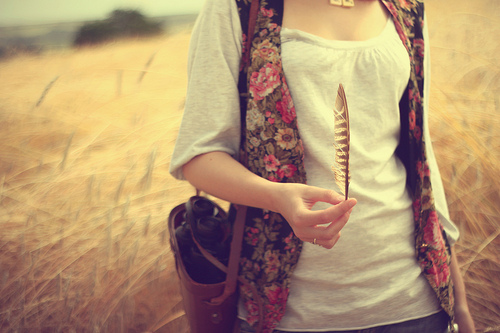
A question. How to achieve the haze effect like in the “The best way to make it through” picture here?
Thanks
Thanks for the compliments Konstantin. You can use a soft filter and a narrow DOF (wide aperture). The image has a medium-low contrast, white-balance is slightly warmer and there’s a little motion blur too. The softness is also part due to the fact that the focus is on the feather.
With all this there may be some amount of post-processing involved too.