Lighting effects can bring out some of the most unique, interesting and dramatic compositions. We have already discussed the various features of light in a previous article and it is essential that you understand light before you proceed with this article. So if you haven’t read that article I’ll wait…
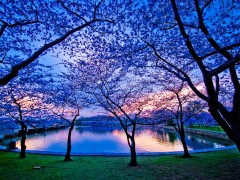
Natural lighting can be the most dramatic and brings out some unusual effects during certain times of the day. The dawn and the dusk are two parts of the day when the natural lighting is in its best and most unusual forms. These times of the day are also referred to as the “Magic Hours” or the “Golden Hours”. The light during these times has very special characteristics – the intensity is very low, the angle is unusual (as compared to the most part of the day when the sun is generally above us), the light is diffused, the sky and the clouds reflect in amber casting different hues and colors. The colors in the scene are varied and more saturated than during other parts of the day, the shadows are long and mysterious and the sky contains a variety of gradients from any one part to the other. The magic hour is one of the best times to experiment and shoot in natural lighting. It is no surprise that some of the award-winning shots of landscapes have been captured during the magic hours.
However shooting during these times of the day pose their own challenges so it is essential that you go prepared – especially when you sacrifice your morning sleep and leave the bed on a cold morning.
- Low Light Conditions: When the sun is on the horizon, light is low in intensity. You will need to be prepared to take long exposures and it is very important that you carry a tripod along to reduce camera shakes.
- Camera Mode: Most of the times I prefer to set the camera to auto mode and it takes care of everything. However auto mode tries to balance the light for optimal exposure of the subject which is not what we want during the magic hours. During the magic hours you want to make sure the auto mode doesn’t overexpose and make the photographs look like as if they were shot in the noon. Set your camera to programmed-auto or the manual mode and experiment. Read Digital Camera Modes: What do they mean.
- Bracketing: You will definitely want to bracket your shots. The underexposed shot will most likely be the one that you will want to retain – it will have saturated colors and very dramatic effects. Read more on how to bracket your shots.
- Timing: The biggest challenge photographers face during the magic hours is the timing of the shot. The light during the magic hours changes so rapidly that you’ll want to start with taking one shot every 5 minutes. Once the sun is on the horizon you’ll want to take one shot every minute. No matter how much you practice there will always be a chance that you may miss the moment. And you don’t want to repent and come back the next day. There are only a few minutes of the magic light during the magic hours. You don’t want to miss them.
- Image Format: In tricky shots like these you want to shoot in RAW (if your camera allows). Though manipulation is not a way of the purists, technology can be leveraged upon to get the best out of every shot (after all beautiful photographs are generally post-processed in one way or the other to make them sell). RAW allows you full control on the picture data.
- Angles: Try different angles. Light during these moments varies with every angle as does the reflection and gradient and the colors.
- Peripherals: As always carry extra battery, storage etc. since you will be taking shots every few minutes, shooting in RAW and bracketing them too.
Now that you know what you need, set the alarm, go out and shoot some lovely pictures and share them with us.


So where do we share our project photos with you? Is there an address to send them to?
quote – ( Now that you know what you need, set the alarm, go out and shoot some lovely pictures and share them with us).
Sincerely – jimoerike
Most of the enthusiasts have a Flickr account. You can simply share a link.