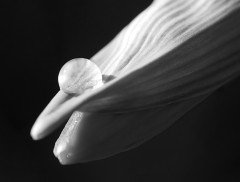
One of the best black and white photography tips you can ever get from a professional photographer is to shoot in color. Shooting in color gives you the flexibility of utilizing the power of colors. And with digital post-processing creativity is the limit. Digital post-processing opens up a wide array of choices and options for adding creative and artistic effects to your photographs. Check out for yourself! Here are 9 post-processing techniques for creating classic black and white in Photoshop.
-
Create A Black & White Adjustment Layer
Black and white conversion with Photoshop is simple, quick and intutive. Let’s start with creating a black and white adjustment layer which retains the color information and also allows full control over how individual colors are converted.
Open the selected image with Photoshop and go to Layer > New Adjustment Layer >Black & White. This creates a new layer and provides a color palette for fine-tuning the shades of particular colors existing in previous image. Click Auto or fine-tune the colors. You can also give a sepia tone to your image by enabling tinting and choosing subtle warm shade of yellow. Check out the tutorial here.
-
Use Hue / Saturation Tool For B&W Conversion
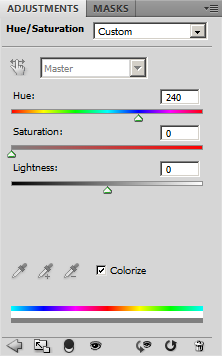 Quite similar to the first technique, here you can convert the image to black & white by creating a new adjustment layer for Hue/Saturation. Desaturate the colors by shifting the Saturation slider all the way left. Hue slider however doesn’t make any difference and you can play around with Lightness slider a bit to adjust the exposure. Here are three quick steps for black & white conversion with Hue/Saturation tool:
- Open the image in photoshop and go to Layer > New Adjustment Layer > Hue/Saturation.
- Slide the Saturation slider all the way left.
- Play around with the Lightness slider to overexpose or underexpose the scene.
Additionally, you can always tweak the exposure with the help of levels and curves.
-
Channel Mixing
All the images are composed of three basic colors — red, blue and green. When you edit the images in the RGB mode, you have access to these channels and the ability to manipulate them. This gives you the digital ability equivalent to using color filters for shooting black and white. Here is the detailed step-by-step procedure for black & white conversion with Channel Mixer in photoshop:
- Go to Layer > New Adjustment Layer > Channel Mixer.
- Tick the Monochrome box.
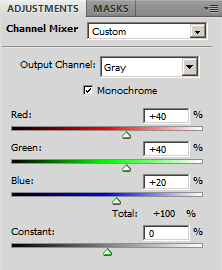
- Move the Red, Green and Blue sliders to left and right to lighten and darken the different tones of the photograph. Make sure that the total of the three sliders is always 100%.
-
Desaturation
Other than desaturating the colors with Hue/saturation tool, Photoshop also provides a desaturate command which converts a color image to grayscale values while leaving the image in the same color mode. You can just press Shift+Ctrl+U or go to Image > Adjustments > Desaturate to convert a color image to black & white in one simple step.
-
Use A Gradient Map
The gradient map is yet another useful tool for black and white conversion. The gradient map tool maps black and white gradient according to the brightness values of the photo. The shadows in the image for instance are mapped to black or dark grey, highlights are mapped to white and the midtones are mapped to the gradations in between.
- Go to Layer > New Adjustment Layer > Gradient Map.
- Choose black & white gradient from the list of gradient fills (or set the default foreground and background colors as dark grey and white & choose Foreground to background from the list of gradient fills).
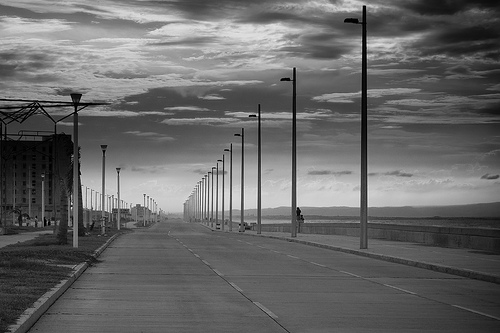
The gradient map simply maps the dark areas to black or dark grey and highlights to white or light grey. This technique however doesn’t allow much control over fine-tuning the image.
-
Convert To Grayscale Mode
The grayscale image mode (Image > Mode > Grayscale) offered by Photoshop converts the colors in the image to black, white and shades of gray. However, this technique is destructive as it discards the color information and also you have no control over the conversion.
-
Lab Color Method
Lab color method is yet another quick and simple technique. The black and white conversion with lab color technique results in a better tonal range. Try out for yourself! Here are the steps to convert the image to black and white with lab color method.
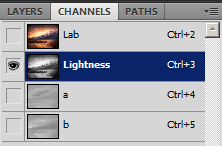 Convert To Lab Color Mode: Go to Image > Mode > Lab Color. Select the Lightness channel from the Channels window (Window > Channels). Now select all with Ctrl+A and copy (Ctrl+C) the selection.
- Switch Back To RGB Color Mode: Switch back to RGB color mode (Image > Mode > RGB Color). Now go to the channels window and paste the selection to the individual channels; i.e. paste the selection to Red, Green and Blue channels individually.
- Preview The Results: Reselect the top channel and preview the results. If you are not impressed by the results go ahead and add Levels Adjustment layer to lighten or darken the photo.
-
Split Toning Black And White Photos
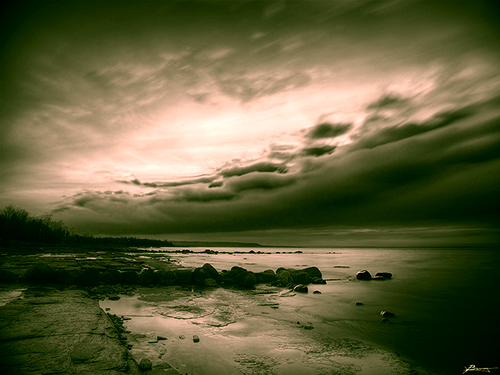
You can get creative with classic black and whites by applying tones and tints. While Sepia tone is an all time favorite, you can always try something new; like split-toning. Split toning is the darkroom technique where the highlights are tinted in one color and shadows are toned in other color. If done creatively, split-toning renders cool retro effect to the image. Here are two quick steps for split toning the image in Photoshop:
- Black & White Conversion: Convert the image to black and white either by creating a black and white layer or desaturating the colors by dragging the Saturation slider all the way left (or by any other technique).
- Apply Split Toning: Add a Color Balance adjustment layer (Layer > New Adjustment Layer > Color Balance). Now adjust the color sliders for Shadows and Highlights respectively. Play around with the sliders till you achieve the desired effect in the image.
-
Selective Colorization / Partial Black And White
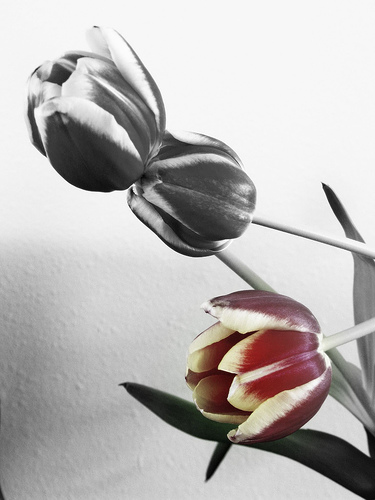
The appeal of classic black and white images is unbeatable. However you can always apply some creative techniques to enhance the beauty of monochromes. Selective colorization for instance infuses the tenderness of colors in the nostalgic world of black and whites. Here’s the step by step guide on selective colorization — the post-processing technique for creating partial black and white photographs.
- Create New Adjustment Layer: Create a new adjustment layer as in the picture below and select Hue/Saturation from the flyout menu. [Click on half black / half white circle at the bottom of the Layers pallete].
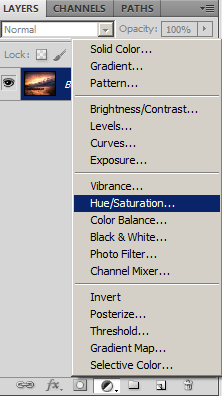
Select Hue/Saturation From Flyout Menu
- Convert To Black & White: In the resulting Hue/Saturation panel, select the Colorize checkbox and drag the Saturation slider all the way left (to set its value to zero).
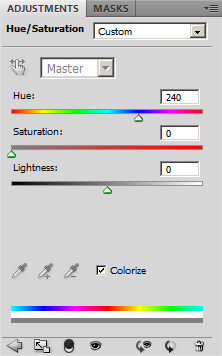
Select Colorize and set Saturation to zero
- Selectively Color the image: Now create a new layer and grab the History Brush Tool from the toolbar. Make sure that the default foreground and background color are set to black and white respectively. With the history brush tool in hand you are all set to retain the colors in your black and white image. Start painting with the brush and see the colors coming back. Apply the brush to selective areas to result in selective colorization as in the following image:
Looking for some inspiration? Check out the Flickr group Selective Colorization for some creative ideas and get going with your mission of creating partial black and white photographs.
- Create New Adjustment Layer: Create a new adjustment layer as in the picture below and select Hue/Saturation from the flyout menu. [Click on half black / half white circle at the bottom of the Layers pallete].
Something missing in the list? Feel free to add your style, technique or useful tips for converting color photos to black and white in Photoshop.


Very nice article. Can I ask you: What version of photoshop sotfware are you using in this presentation?
Thanks a lot.
Roberto lino.