Lens correction is a tool in various photo editing software tools that majorly corrects lens induced distortions like vignetting, barrel distortion and chromatic aberration. Lets see what do these terms mean, why do these distortions occur and how we can fix or reduce them. Lens distortion occurs in every lens. There’s no lens which has no distortion. A clear understanding of the various distortions and how to correct or minimize them is key to getting realistic pictures. While we are at it, it must be noted that some lenses like the fish-eye lenses have geometric distortion that you cannot do away with. Even though you can work hard of correcting such geometrical aberrations, some people buy fish-eye lenses for the (geometric distortion) effect that they impart to the picture.
Lens Vignetting
Vignetting is the fall off in light intensity at the edges and corners of a photograph. It usually happens with wide angle, macro and long telephoto lenses. These lenses contain multiple lens elements. When light travels towards the sensor through multiple lens elements, each lens element refracts the light towards the center of the lens, hence making the light rays narrower as they reach the sensor. Eventually, more intense light rays reach around the center of the sensor, and less intense at the edges and corners. Vignetting is more pronounced at the longer length of the lens than at the wide range.
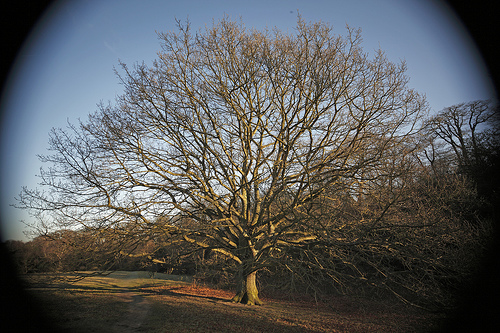
Optical vignetting can be corrected in Adobe Lightroom 4 by following the steps below:
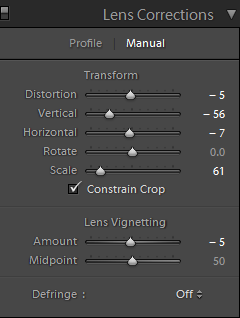
- Import the photo into the Adobe Lightroom 4.
- Go to “Develop” module.
- Open the “Lens Correction” panel.
- In the “Lens Vignetting” section, slide the sliders for “Amount” and “Midpoint” to adjust vignetting. A positive value reduces the vignetting.
If you want to induce or exaggerate the vignette effect, you can go to the effects panel and change the Amount slider.
Geometric Distortion
It refers to the conversion of straight lines into curve lines near the edges, when camera is placed at extreme angle to the subject. Apart from this, with round glass elements in the lens, light bends inwards near the edges of the lens and hence it makes straight paths curved.
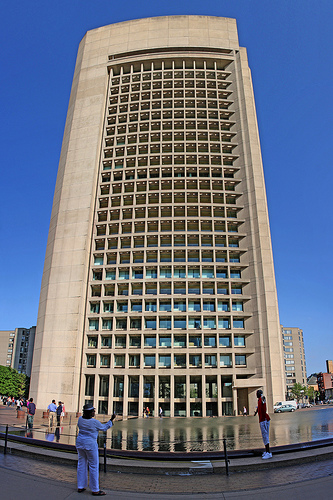
Barrel distortion can be corrected in Adobe Lightroom 4 by following the steps below:
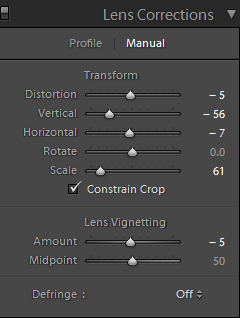
- Import the image into Adobe Lightroom.
- Go to “Develop” module.
- Open “Lens Corrections” tab.
- Use the sliders to adjust “Distortion”, “Vertical”, “Horizontal”, “Rotate” and “Scale”. The literal values in the above figure may not work for you.
Chromatic Aberration
It is also known as achromatism or chromatic distortion. It refers to the presence of unusual colors at many high contrast places in the image. This happens due to the failure of lens to focus all colors (from the scene) at single convergence point. Thus, we see unexpected colors along the boundaries that separate dark and bright parts of the image. This happens because lens has a different refractive index (ability to bend light rays) for different wavelength of light (colors). The refractive index decreases with increasing wavelength, hence each color in spectrum cannot be focussed at a single point on sensor.

Adobe Lightroom 4 has one click method to reduce the color fringes in the image. It can be done by following the steps below:
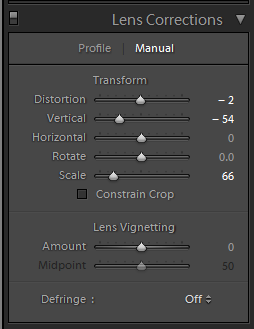
- Import the image into Adobe Lightroom.
- Go to “Develop” module.
- Open “Lens Corrections” tab.
- Select “Highlight Edges” or “All Edges” under “Defringe” drop-down menu.
This can be better adjusted in Adobe Camera Raw 6.0, by following the steps below:
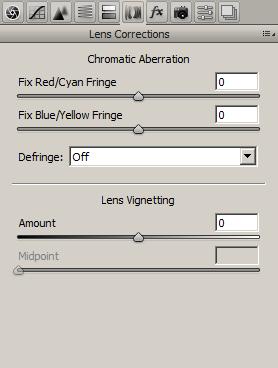
- Open the image in Adobe Camera Raw 6.0.
- On the right hand side, go to “Lens Correction” tab.
- Under “Chromatic Aberration”, move the sliders to adjust the fringes.
There are other ways as well to adjust the above three effects. Many new cameras have this post processing tool built-in. However the above mentioned photo editing tools are the most widely used by photographers. How do you take care of such distortions?

