This is the first tutorial of its kind on APN about photographic and other special effects. I had a beautiful photograph of my son and I wanted to make it my desktop wallpaper. But not without adding some special effects. The torn edge frame effect was the one that came to mind. But the tutorials were either too long, unrealistic or just not relevant. Here’s something simple you can do to add a torn edge effect to any photo. Fire up Photoshop. We are going to use this photo —

- Select the part of the picture that you want to retain in the frame — a good estimate is about 5-10 pixels from the edges like so:

- Next, (align the selection to the center if not already and) go into quick mask mode using the last button on the Tools.

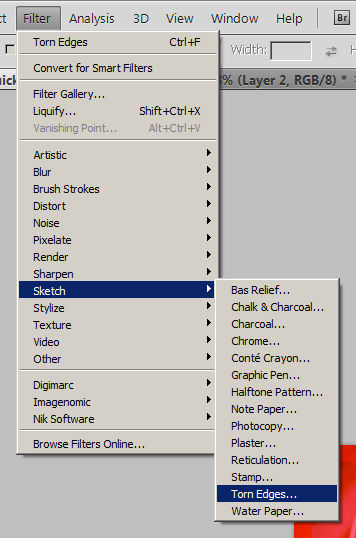
- Go to Filter > Sketch > Torn Edges…

- See the edge preview here (like in the picture below) and adjust the settings using the controls on the top right and click OK.

- Exit out of the quick mask mode using the button as in step 2. You’ll have the following area selected:

- Right click on the image and click Select Inverse. You’ll now have the edges selected. Hit Delete on the keyboard and you’ll have the torn edges frame —

We’ve shown this on a patterned background to distinguish the photo’s white edge from the page background. This method works the best on medium sized images. Share or bookmark this tutorial. What other methods have you tried to create the torn edges frame effect?


Great technique! I will try that one out, keep it coming, great stuff!
This is the fitting blog for anyone who wants to search out out about this topic. You understand so much its virtually exhausting to argue with you (not that I actually would need…HaHa). You definitely put a brand new spin on a subject thats been written about for years. Nice stuff, simply nice!