
Post processing adds the magical dust to your images. Simple sliders, easy to use interface and great image effects make the Lightroom standout for us photographers. Of late, I have become the fan of Split Toning.
Split Toning is an amazing image effect used to re-create the mood of the photograph. While most of you might have already experienced the artistic appeal of split toning, here is a simple guide to begin with using this creative effect.
What Is Split Toning?
Toning refers to the traditional darkroom technique wherein black and white prints were dipped into chemicals to change its color. Back then, different combination of chemicals were used to give artistic effects to the prints. This specialized treatment helped in creating multi toned images which involved tinting the highlights in one color and shadows in other color. And the result was — Split Toning.
Nowadays, this effect can easily be replicated in digital darkroom, that is, various image editors. Be it GIMP, Adobe Photoshop or Lightroom; the professional image editing solutions offer the ease of split toning the images. While Photoshop’s Duotone helps in achieving the similar result, Lightroom’s dedicated Split Toning panel is the easiest way to split tone black and white as well as colored images.
Split Toning In Lightroom
Split toning with Lightroom is wink of an eye. It’s just the matter of playing around with the sliders and your creative vision for the final result.
Here’s a simple guide for adding cool, retro, lomo effect to your photographs. Fire-up Lightroom and play around with split toning settings. Check out the steps below:
-
Step One: Choose An Image
Traditionally, toning was applied to black and white photographs. The most popular ones being the selenium toning for red-brown or purple-brown tone and sepia toning for a brownish-grey tint. These tones were a great add-on for changing the mood of the image. Toning transforms the classic appeal black and white to add emotions and nostalgic feel to the images. But with digital photography and digital darkroom you can apply toning to color photographs as well. Toning works well for most of the subjects; be it landscapes or simple portraits it completely changes the mood and atmosphere of the photograph. Check out for yourself.
Before Split Toning
After Split Toning
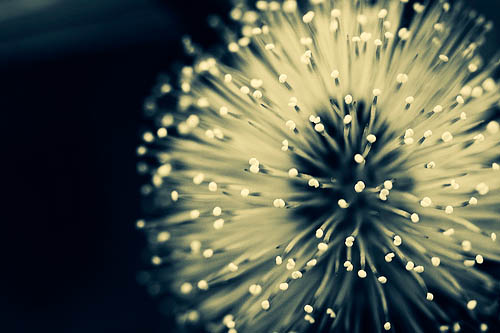
Rejuvenation: Split Toning Effect
-
Step Two: Make Subtle Adjustments
Tweak the exposure, correct the contrast and play around with sharpening and all. Once you’re done with all the other adjustments, get on to split-toning panel to add creative colors to your images. You can however skip this step and directly jump on to trying the artistic appeal of split toning.
-
Step Three: Over To Split Toning Panel
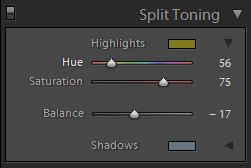
Split Toning Panel
In the develop module, expand the Split Toning module by clicking on the triangle to the right. It consists of three settings: Highlights (for setting the highlight tone), Shadows (for setting the tone for shadows) and Balance (to adjust the ratio of highlights to shadows).
- Pick A Highlight Tone: The highlight tone adds the selected color effect to the brighter areas of the image.
- Pick A Shadow Tone: The shadow tone washes the dark / shadow areas in the histogram with selected color.
- Balance The Highlight / Shadow Tones: The balance slider allows you to fine-tune the toning effect. By default the balance is set to zero. Moving the slider to the right, outweighs the highlight tone and sliding it to the left, overpowers the shadow tone. Play around with the slider to achieve the desired effect.
-
Step Four: Save The Settings
Now that you are content with the effect, you can save the settings and apply it to multiple images without actually playing around with the sliders for individual images. In the develop module go to Settings > Copy Settings or simply press Ctrl+Shift+C to open up the Copy Settingsdialog box as below. Uncheck all the settings except for Split Toning and click on Copy to copy the settings.
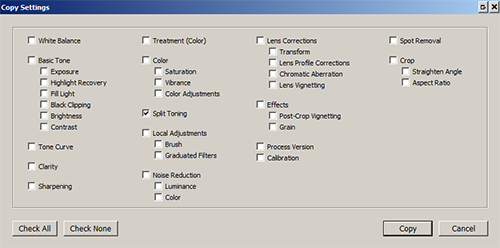
Copy Settings Dialog
Now switch to Library Module, select the images to which you want to apply split toning. Go to Photo > Develop Settings > Paste Settings or press Ctrl+Shift+V to instantly apply sepia toning to multiple images. This will add beautiful vintage effect to all your images.
Or better yet, you can create your own split toning preset and apply it any image over time. In the Develop module, click on the + next to Presets to open New Develop Preset dialog. Select the settings you want to preserve, provide the name of the Preset and click Create. Here you have your own preset for applying split-toning.
How about giving it a try? Don’t forget to share your results with us.

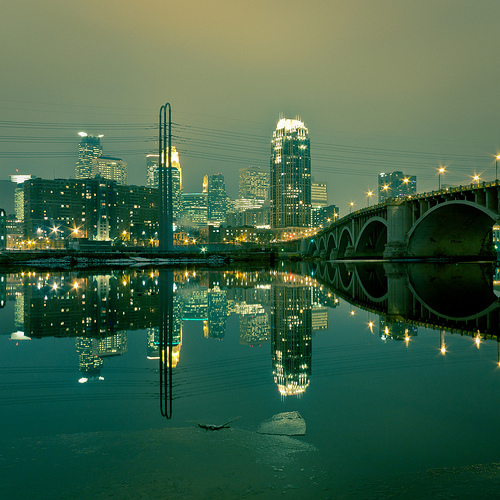

Very easy to follow and understand. What settings did you use to achieve this look?
Thanks
Steve