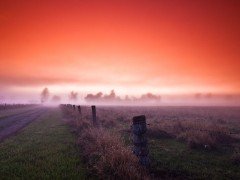
Photoshop is universally considered to be a killer digital image editor and for digital photographers it is an extremely powerful post-processing tool. But the professional post-processing is not restricted to Photoshop only, you can use the same adjustments to fine-tune the images in Lightroom, Capture NX or GIMP as well. With the proper information about the adjustments involved in color correction, image enhancement and fine-tuning the image for sharpness, contrast, etc. you can bring out the best in your photos. Here are 7 Photoshop tutorials that will help you get familiar with the tips and tricks involved in post production process using Photoshop (which you can of course try out in other photo-editors as well). These tutorials serve as the guide to get started with the Photoshop adjustments but the final result is largely influenced by your personal liking.
-
Photoshop Tutorial On Sharpening: The Sharpen Filter
This tutorial is presented by Deke McClelland as a part of its tutorial series titled Photoshop Top 40. McClelland is a well-known Photoshop expert and in this tutorial, he talks about image sharpening. In this tutorial, he explains the three techniques for sharpening the images — by using Unsharp Mask, Smart Sharpen and High Pass filter, respectively.
-
Using Levels In Photoshop
Playing around with the levels is the favorite trick of photographers to fine-tune the contrast of the image. The Photoshop levels is a powerful tool for adjusting the brightness levels, contrast and tonal range of the image. This tutorial throws light on how adjusting the levels in the image histogram helps you in fine-tuning the contrast.
-
Curves: Photoshop Tutorial To Learn The Power Of Curves
Similar to the Photoshop levels, Photoshop curves tool enables you to adjust the tonal range and contrast in the image. But the curves tool is more flexible as it allows you to play around with the tonal curve for redistributing the contrast. This tutorial helps you in understanding how to effectively use the curves to enhance the contrast in the image.
-
Photoshop CS5: Noise Reduction
Shooting in low-light brings in the sensor amplification artifact known as the noise. The camera automatically boosts the ISO level to compensate for low-light which results in introducing the grain. You can however, get rid of this artifact by using the noise reduction technique used in this tutorial.
-
Different Ways To Remove Color Cast In Photoshop
Unwanted color cast spoils the overall mood of the photograph. Here in this tutorial, you can learn various ways to part with the color cast like using auto-commands (auto tone and auto color), variations, match-color and other advanced commands to resurrect the color cast of the image.
-
Photoshop Tutorial On Color Saturation
One of the ways to enhance the photographs is to process the images to bring out the lively colors. This tutorial focuses on saturating the colors by using Photoshop’s lab color mode. The tutorial also shows how to use Unsharp mask for sharpening the image and how to use curves for fine-tuning the colors.
-
Add Dramatic Colors To Photograph
In this tutorial, a RAW image is used for transforming the mood of the image. The image is re-created to bring in the mesmerizing effect of the photographs shot during the sunset. Most of the time, if you are not well aware of the technique, in-camera sunset shots appear as shot in the daylight (refer to thumb rules for in-camera trick for shooting sunset). This tutorial comes in handy to re-create the sunset magic in Photoshop.
What adjustments do you make to fine-tune your images?


Excellent tutorials. Thanks for sharing.
Great tuts, thank you!